To use a soundbar in your RV, first choose a model with versatile connectivity options like HDMI or Bluetooth. Make sure it’s mounted at ear level for ideal sound quality. Connect it securely to your TV, ensuring that the audio settings match. Avoid placing the soundbar in enclosed spaces to prevent muffled sound. Test different audio modes for the best experience. For more information about soundbars and tips on enhancing your RV audio setup, explore our resources dedicated to soundbars.
Key Takeaways
- Mount the soundbar at ear level to enhance audio clarity without obstructing the TV view.
- Ensure compatibility with your soundbar’s audio output options, such as HDMI ARC, optical, or RCA connections.
- Use L-brackets or shelves for secure installation, maximizing space in your setup.
- Employ Velcro strips to secure the soundbar during travel to prevent movement and damage.
- Manage cables neatly to maintain a tidy setup and avoid clutter around your soundbar.
Choosing the Right Soundbar for Your RV
Choosing the right soundbar can significantly enhance your audio experience while traveling in your RV.
It’s essential to prioritize models with versatile connectivity options, such as HDMI, optical, USB, AUX, and Bluetooth, to ensure compatibility with all your devices.
Prioritize soundbars with versatile connectivity options like HDMI, USB, and Bluetooth for seamless compatibility with all your devices.
Look for compact and lightweight soundbars that are designed for outdoor use; these are built to withstand environmental conditions and deliver improved sound quality.
Additionally, consider soundbars that offer multiple audio playback modes—like music, movie, and news modes—to suit various listening scenarios.
Positive customer reviews are a good indicator of user satisfaction and sound quality, and evaluating installation options will help you position the soundbar at ear level without obstructing views in your RV.
Connection Methods for Your Soundbar
When connecting your soundbar in an RV, you have several options to consider, including Bluetooth connectivity, HDMI and optical cables, as well as RCA and AUX connections.
Each method varies in convenience and sound quality, so it’s essential to match your soundbar’s input with your TV’s audio output.
Bluetooth Connectivity Options
While enjoying your time in an RV, connecting a soundbar via Bluetooth offers a hassle-free way to enhance your audio experience. Many modern soundbars feature Bluetooth connectivity for wireless streaming from smartphones and tablets.
To connect, verify both your soundbar and device are in pairing mode, indicated by a blinking light. Once paired, you can easily switch between devices, making it ideal for outdoor gatherings or movie nights.
With a typical range of 30 feet, you’ll have flexibility in device placement. Some soundbars also allow HDMI, optical, or RCA cable connections, ensuring you can create a more integrated audio setup when needed.
HDMI and Optical Cables
To enhance your audio experience with a soundbar in an RV, connecting via HDMI or optical cables can significantly improve sound quality.
HDMI cables not only provide high-quality audio but also video transmission, with HDMI ARC functionality allowing for two-way communication between compatible devices. On the other hand, optical cables serve as a reliable alternative, effectively transmitting digital audio signals without interference.
It’s crucial to ensure that both your TV and soundbar have compatible ports by checking the user manuals. Additionally, adjusting the audio settings on your TV to select the correct output source is key to optimal soundbar performance.
Lastly, investing in high-quality cables is important; for longer distances, consider cables with enhanced specifications to prevent signal degradation.
RCA and AUX Connections
Connecting your soundbar in an RV can be straightforward if you utilize RCA and AUX connections effectively.
Follow these steps for a seamless setup:
- Plug the red and white RCA cables from the soundbar’s audio input into the TV’s audio output.
- If using AUX input, connect a 3.5mm audio cable from the headphone jack of your TV to the soundbar.
- Verify the soundbar is powered on and select the correct input source.
- Check that volume levels on both the soundbar and TV are balanced for the best performance to avoid poor sound quality, and inspect for any faulty cables.
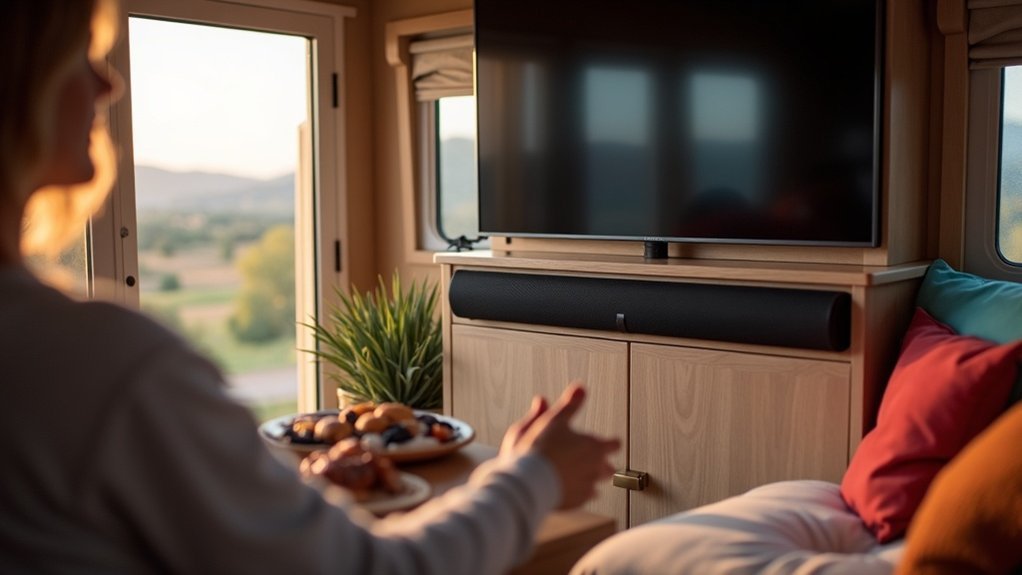
Optimal Placement for Enhanced Audio
For the best audio experience with your soundbar in your RV, it’s essential to mount it at ear level. This positioning aligns the sound output directly with your ears, enhancing clarity and immersion.
Mount your soundbar at ear level for optimal clarity and immersion in your RV audio experience.
Place the soundbar centrally below the TV to ensure that sound effectively reaches the seating area, which minimizes distortion. Avoid placing it in enclosed spaces or behind objects that can muffle the sound.
If you opt for an adjustable bracket, you can customize the placement to suit different seating arrangements.
Additionally, if your setup includes a subwoofer, position it in a corner or close to the seating area to boost bass response while maintaining overall sound balance for an immersive listening experience.
Troubleshooting Common Sound Issues
Even with ideal placement, you might encounter sound issues with your soundbar in the RV. Here’s how to troubleshoot:
- Check Connections: Verify all connections between the soundbar and TV are secure; look for INPUT connections on the soundbar and AUDIO OUTPUT or HEADPHONE ports on the TV.
- Audio Settings: Confirm the correct audio settings on both devices, enabling HDMI ARC if available or switching to the appropriate input mode.
- Bluetooth: If using Bluetooth, make sure the soundbar is in pairing mode and the TV allows connections.
- RCA Cables: Use RCA cables for older TVs lacking modern ports. Refer to user manuals for additional troubleshooting steps.
For more information on optimizing your soundbar experience, check out our comprehensive guides and tips!
Installation Tips for RV Sound Systems
Installing a soundbar in your RV can considerably enhance your audio experience, but proper placement is essential for ideal performance.
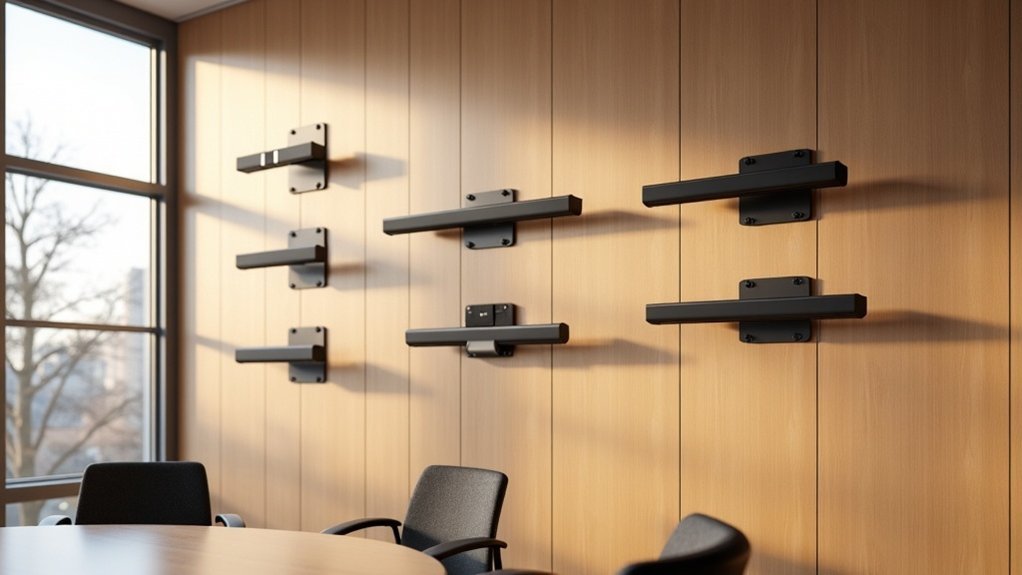
Mount the soundbar at ear level, ensuring it doesn’t obstruct your TV. Use an L-bracket or shelf to securely install it below the TV, maximizing space in compact environments.
Verify the soundbar’s compatibility with your TV’s audio output options, such as HDMI ARC, optical, or RCA connections.
For travel, consider using Velcro strips to keep the soundbar secure and prevent shifting.
Additionally, plan for cable management by leaving excess cables on a shelf or behind the soundbar to maintain a tidy setup.
Community Recommendations and Experiences
As soundbar enthusiasts share their experiences, you’ll find that many recommend Bluetooth soundbars for their ease of wireless connectivity, which simplifies setup and reduces clutter.
Many soundbar enthusiasts advocate for Bluetooth models due to their convenient wireless setup and reduced clutter.
Here are some key insights to enhance your soundbar experience:
- Choose soundbars with HDMI ARC support for seamless TV integration.
- Mount soundbars at ear level to greatly enhance audio clarity, especially in compact spaces.
- Opt for soundbars with multiple audio playback modes to enrich your listening experience across various activities.
- Utilize Velcro strips or non-permanent mounting solutions to secure soundbars during travel, ensuring stability and functionality.
These soundbar community tips can enhance your audio setup and enjoyment in any setting.